Top Striker Picks for Mashmak PvPvE Combat
Arena modes favor raw brawling. Across Mashmak's 256 square kilometers, speed and sustain dictate who reaches evac alive.
Light, high-mobility Strikers dominate long-distance transit. High cruising speeds and efficient aerial lift let them cross the map between objectives without draining energy reserves. Crucially, speed lets you disengage the instant a rival team third-parties your boss fight.
+------------------------------------------------------------------------+
| STRIKER SELECTION IN MASHMAK: MOBILITY VS FORTIFICATION                |
|                                                                        |
| High-Mobility Strikers:                                                |
|  - Rapid map rotation across 256 sq km terrain                         |
|  - Low energy consumption during extended aerial transit               |
|  - Easy disengagement against third-party ambushers                    |
|                                                                        |
| Anchor Strikers (Tricera):                                             |
|  - 70,000 base HP pool provides unmatched survivability                |
|  - Fortress Form 360-degree shielding locks down beacon zones          |
|  - Gatling Guns and Repair Drones grind through Theia AI units         |
+------------------------------------------------------------------------+
For holding extraction beacons under fire, Tricera serves as the premier heavy anchor. It brings a 70,000 base HP pool, twin Gatling Guns, and onboard Repair Drones. Switching to Fortress Form deploys a 360-degree shield bubble, buying crucial seconds for squadmates to bank salvage or finish terminal inputs.
Health operates on a two-layer system: outer white Fluid Armor and an inner red core health pool. Ballistic fire applies steady pressure, while energy weapons rapidly melt white Fluid Armor. Melee strikes bypass Fluid Armor entirely to damage the red core health directly. Aquila's Mobile Beam Cannon also pierces straight through outer shielding into core HP. If your red health takes a hit, disengage from dedicated melee frames immediately.
Energy management is your true survivability metric. Completely draining your boost gauge triggers an overheat state, disabling all dashes and dodges until the bar recharges. When low on energy during a dogfight, land immediately. Grounded Strikers recover boost significantly faster than hovering frames.
Glider Crafting and Equipment Research Progression
Traversing Mashmak on foot burns your boost gauge and wastes critical looting time. Crafting and upgrading Gliders via Equipment Research unlocks secondary weapons, specialized combat utility, and high-speed map travel.
The table below outlines the research data and credit investments required to manufacture and outfit your Glider fleet across five distinct tech levels.
| Glider Chassis & Pack | Research Cost | Matrix Credit Fee | Tactical Role & Built-In Armament |
|---|
| Vehicle Glider | 4 Vehicle Glider Data | 8,000 Credits | Base high-mobility transport for rapid 256 sq km map traversal |
| Restraint Pack Glider | 2 Research Data | 4,000 Credits | Equips Gatling Guns, Rocket Pods, and Levels I-V reload perks |
| Sniper Glider | 2 Research Data | 4,000 Credits | Equips Mobile Beam Cannons, Jamming Missiles, and charge perks |
| Enhancement Glider | 2 Research Data | 4,000 Credits | Equips Heavy Howitzers, Jamming Haze Diffusers, and Turret Drones |
| Melee Glider | 2 Research Data | 4,000 Credits | Equips Induced Swords, Complex Shields, and Assault Thrusters |
| Support Glider | 2 Research Data | 4,000 Credits | Equips Repair Drones, Interference Kits, and Defense Drones |
Glider schematics require specific Research Data packs and Matrix Credits to manufacture and scale across tech levels I through V.
Build the base Vehicle Glider first for dependable travel. Once your credit bank grows, branch into the Support Glider for squad repairs or the Sniper Glider for long-range defense. If you need to top up your account balance to speed up your Striker and Glider progression, prioritizing high-yield component runs speeds research considerably.
Farming Corite Extractors and Defeating Theia Vanguard
Basic roaming grunts carry low-tier scrap. To pull rare salvage and high-grade mods, your squad must raid Theia Vanguard installations and crack active Corite Extractors.
TACTICAL PvE CLEAR SEQUENCE:
1. Scout the Extractor perimeter for elite Vanguard snipers.
2. Strip Vanguard heavy shields with sustained energy fire.
3. Close distance with melee strikes to bypass Fluid Armor.
4. Interact with the Extractor terminal to siphon raw Corite.
5. Check radar for third-party player signatures drawn by the alarm.
Follow a strict attack order when hitting an Extractor outpost:
- Pick off elevated Theia Vanguard snipers first to avoid direct core health damage while maneuvering.
- Concentrate energy fire on heavy defensive drones to drop their Fluid Armor before they establish firing lanes.
- Dispatch melee Strikers to eliminate Vanguard commanders with armor-bypassing strikes.
- Interact with the central Corite Extractor console to claim purple and gold loot crates.
- Form defensive perimeters immediately—the extractor alarm broadcasts your position to nearby squads.
Complete dynamic in-match HUD challenges as you clear zones. Objectives like downing two troopships or gathering six Corite specimens pay 400 to 800 Matrix Credits on the spot. These side tasks reset every drop and build your wallet even when avoiding contested bosses.
Outside deployments, daily Discord check-ins supply bot codes that send Ultimate Maintenance Boxes—stocked with bonus Corite—directly to your in-game mailbox.

Mid-Match Rocket Banking and Beacon Extraction Tactics
Waiting for the final extraction beacon to secure loot is the fastest way to lose everything. A single ambush at the final pad scatters all unbanked salvage across the ground.
Call down a mid-match extraction rocket to eliminate that risk. This mechanic lets your squad secure up to three high-value items—such as gold salvage or Flawless mods—directly into your permanent account inventory. Once loaded into the rocket, those items stay safe even if your squad wipes moments later.
When the final extraction phase begins, enforce strict beacon discipline:
- Never rush the terminal the second it goes live. Scan surrounding cliffs and roofs for Aquila snipers or beam-equipped Gliders.
- Assign one pilot to activate the terminal. The other two hold crossfire angles and deploy smoke or jamming hazes.
- Drop heavy shielding over the beacon. A deployed Tricera in Fortress Form provides complete 360-degree cover against incoming projectile barrages.
- Preserve energy during the extraction timer. Avoid erratic jumps while contesting the beacon. Ground your frame to keep the boost gauge full for emergency dodges.
To reinforce your chassis for endgame extractions, you can secure supplies through Mecha Break top-ups to maintain a well-equipped hangar.
Mashmak Mod Systems and Assembly Mechanics
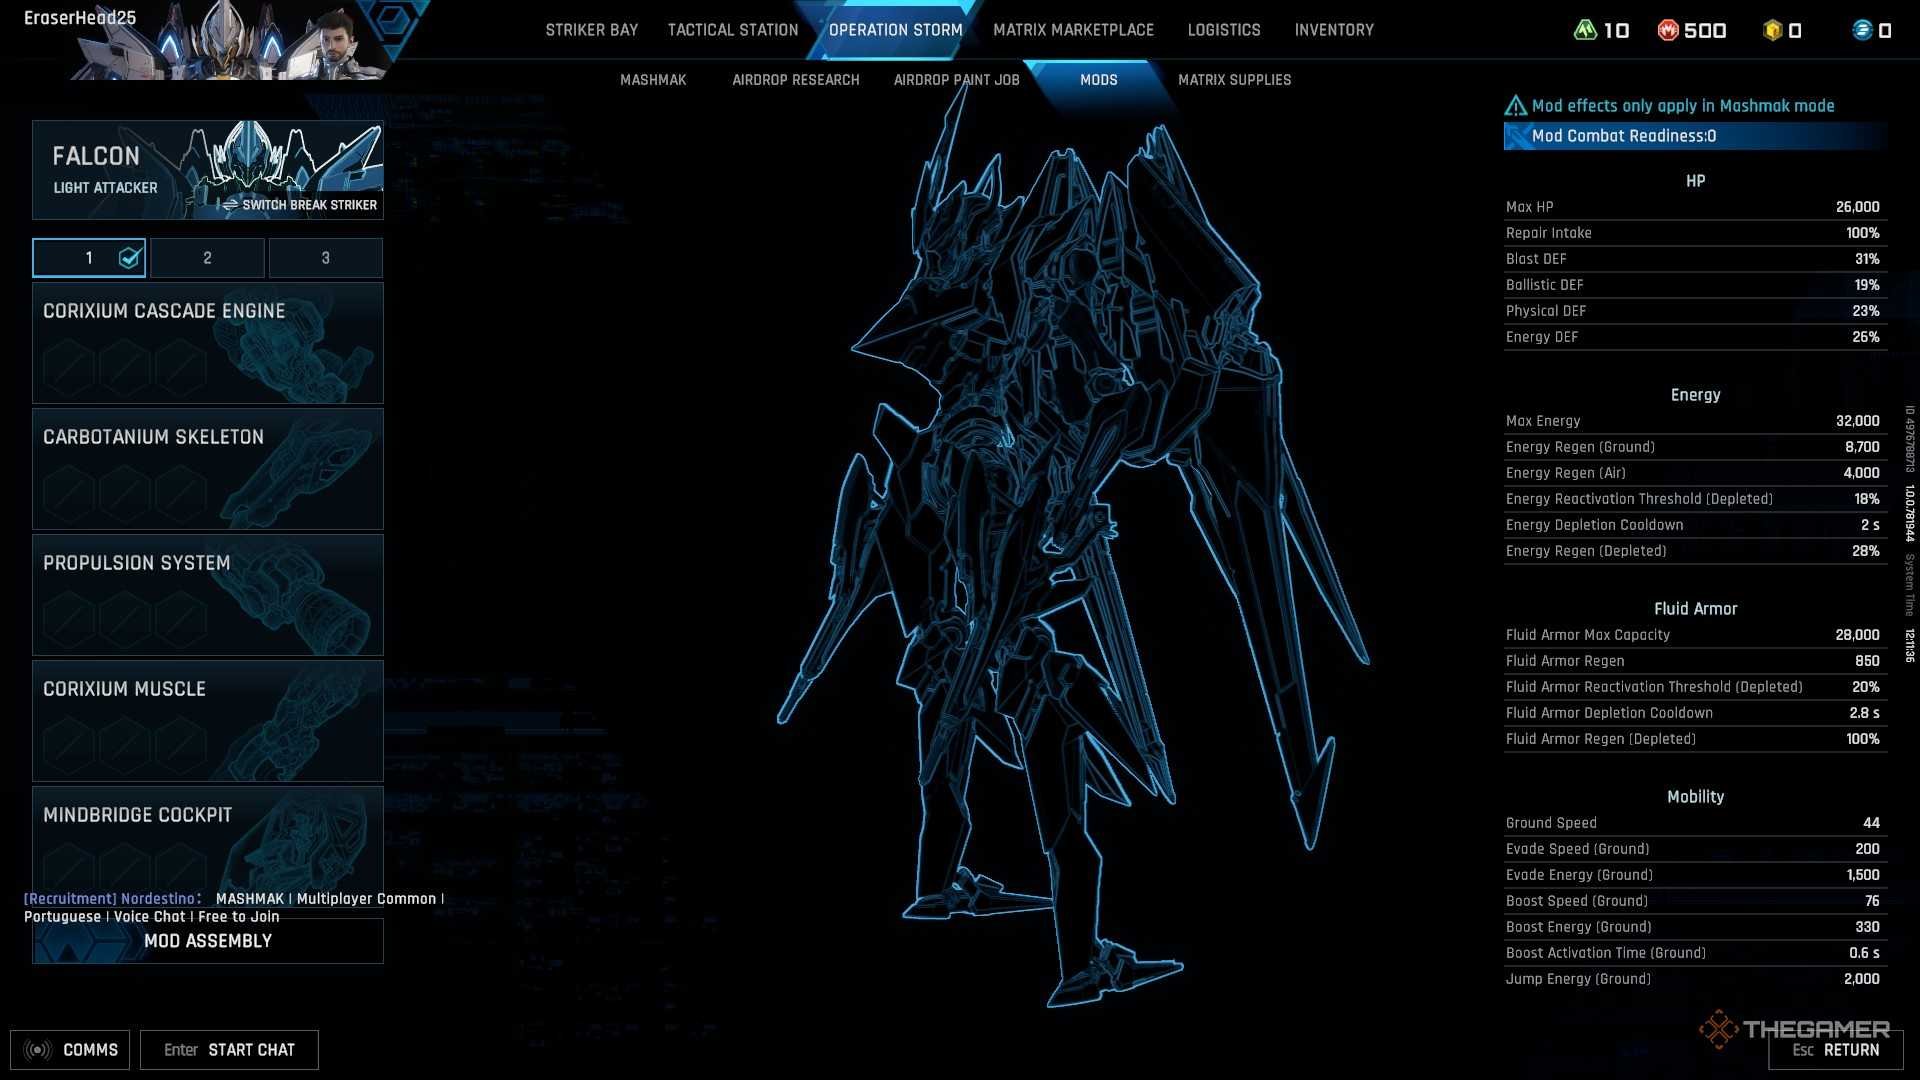
Mashmak is the only mode in Mecha Break featuring custom mechanical mods. Standard arena modes disable them to preserve competitive balance. In Mashmak, a tuned mod loadout substantially increases your damage output and survivability.
Each Striker has 15 mod slots spread across 5 core mechanical components. Every component accepts up to 3 mods across four tiers: Fine, Superb, Rare, and Flawless.
| Mechanical Component | Slot Capacity | Primary Stat Enhancements |
|---|
| Corixium Cascade Engine | 3 Mod Slots | Energy recovery rate, boost efficiency, overheat recovery speed |
| Carbotanium Skeleton | 3 Mod Slots | Base durability, collision impact resistance, physical mitigation |
| Propulsion System | 3 Mod Slots | Cruising speed, aerial lift velocity, dash distance |
| Corixium Muscle | 3 Mod Slots | Melee weapon damage, stagger duration, swing recovery time |
| Mindbridge Cockpit | 3 Mod Slots | Lock-on range, electronic countermeasure resistance, radar sweep |
Equipping mods across all 15 component slots tailors your Striker's performance specifically for Mashmak extraction runs.
When low-tier mods clutter your inventory, use the workshop Mod Assembly system. Combining 10 identical lower-tier mods with a Matrix Credit fee crafts 1 guaranteed mod of the next tier.
Assembled mods roll with randomized stat trade-offs, such as boosting cruising speed at the expense of slight Fluid Armor capacity. Inspect each stat line before locking it into your build.
Monetizing Loot and Managing In-Game Currencies
Extracting with full holds is only the first step. Turning those spoils into functional power requires working the economy.
Corite serves as the primary currency for high-tier progression and pilot trade. Earn Corite by extracting rare salvage and listing it on the player-run Matrix Marketplace. Pricing in-demand weapon parts and Flawless mods competitively builds your Corite reserve fast.
Early playtests allowed direct Corite-to-Matrix Credit conversion, but the full release removed that exchange. Each currency now operates within its own dedicated loop.
| Currency / Point Type | Primary Mashmak Acquisition Source | Primary Hangar & Marketplace Utility |
|---|
| Corite | Extractor salvage, Matrix Marketplace trading | Purchasing high-tier player listings and advanced workshop items |
| Matrix Credits | In-match challenges, Bulk Sell, Military Supply Sale | Crafting Gliders, assembling higher-tier mods, baseline research |
| Mission Points | Combat score and objective completions in Mashmak | Converts at a 10% ratio into Merit Points upon match conclusion |
| Merit Points | Direct conversion from match Mission Points | Redeemed in Logistics to unlock exclusive cosmetics and Strikers |
Mashmak activities generate distinct currencies that fuel workshop crafting, player trading, and Logistics acquisitions.
For low-tier scrap unsuitable for the marketplace, use Bulk Sell or Military Supply Sale in your inventory. This converts junk items straight into Matrix Credits to cover Glider crafting and Mod Assembly fees.
Match performance also awards Mission Points. At the end of a run, 10% of your Mission Points convert into Merit Points (730 Mission Points yield 73 Merit Points). Spend Merit Points in Logistics on exclusive cosmetics and pilot assets, including the Inferno Striker frame.
To keep workshop materials stocked without grinding low-yield salvage runs, you can acquire extra Corite and Matrix resources for your account.
Crucial Mashmak Evacuation Mistakes to Avoid
Transitioning from arena PvP to extraction rules catches many pilots off guard. Avoid these four common tactical errors:
- Hoarding Gold Crates Without Using the Loot Rocket: Never hold three gold items in your backpack while pushing deeper into the map. Summon the mid-match loot rocket the moment you secure top-tier salvage to lock it into your account.
- Triggering Energy Overheat in Open Sightlines: Draining your entire boost gauge to reach an extraction terminal leaves your frame defenseless. Land with at least 20% energy in reserve so you can dodge incoming fire.
- Ignoring Fluid Armor Bypass Weapons: Melee strikes and Aquila's Mobile Beam Cannon pierce white shield bars directly to hit red core health. Disengage immediately if your core HP is low.
- Fighting Outside the Safe Zone During Storm Surges: Never battle Theia AI while a Corite Pulse Storm closes in. Storm damage ramps quickly and drains repair kits before you reach extraction.
FAQ
Call down an in-match loot rocket to bank up to three high-value items immediately. Banked crates remain safe even if your squad gets wiped later.
What happens to your inventory if your Striker is destroyed in Mashmak?
Dying before extraction forfeits all unbanked loot and salvage collected during that run. Your Striker frame remains safe in your hangar, but carried crates drop on the field.
Do equipped mods apply to standard PvP modes like Ace Arena?
No. Mod stats function exclusively in Mashmak extraction. Standard competitive modes disable mods to preserve baseline balance.
Reach Achievement Level 13 on your pilot profile. Until then, the matchmaking system automatically places you into three-player squads.
What is the conversion rate of Mashmak Mission Points to Merit Points?
Mission Points convert to Merit Points at a 10% ratio upon match completion. Earning 730 Mission Points in a run awards 73 Merit Points for Logistics unlocks, such as the Inferno Striker.
How do you upgrade lower-tier mods into higher rarities?
Combine 10 identical lower-tier mods alongside a Matrix Credit fee in the Mod Assembly menu. This crafts one guaranteed mod of the next rarity tier with randomized stat trade-offs.
How can you tell if an incoming enemy attack ignores your Fluid Armor?
Melee weapon strikes and specialized beam ordnance, like Aquila's Mobile Beam Cannon, deal direct damage to your red core health pool, bypassing white Fluid Armor completely.
Final Tactical Checklist for Mashmak Drops
Success in Mashmak requires disciplined execution: drop into the 256-square-kilometer zone, build your Glider early, raid Theia extractors with armor-bypassing strikes, bank high-tier loot via the rocket, and secure extraction pads behind heavy shields. Treat your energy gauge as your life bar, track Corite Pulse Storm paths, and sell surplus scrap on the Matrix Marketplace to fund your next drop.











Comments