
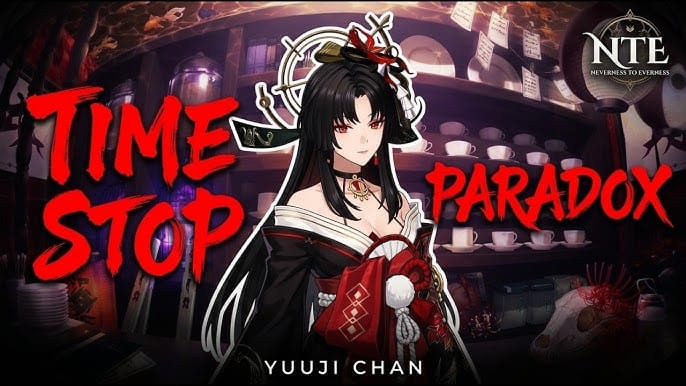
Xun The Time Witch Guide: Time Stop & Abyss Dominance
Xun, the witch most players meet in-game as Hotori, clears Abyss faster than nearly anything else this patch because of one number: a 12-second time stop. That's the verdict, and the catch sits right behind it. Build her around energy uptime instead of raw attack, or that ceiling never shows up. Tier lists that rank her in a vacuum are lying to you by omission. Her output is gated by who stands next to her, and a single mistimed gauge cuts her real damage roughly in half.
I went in braced for another stack-attack, mash-ult carry. What I actually spent the testing window on was narrower: whether the time stop deserves the hype-video worship, how the timepiece gauge behaves across back-to-back rotations, and whether a no-signature F2P shell can still close out endgame. The bar I set was a clean, repeatable cycle. One guaranteed freeze per rotation, zero skipped windows. Below is what survived contact with the game and what folded.
Reading the time-stop mechanic before you trust anyone's guide
Start with the math, since almost every rotation writeup skips it. Hotori's ultimate freezes time for 12 seconds, halting enemy action and, more importantly, locking you out of character swaps for the entire stretch, per a YouTube kit explanation video that breaks the mechanic down frame by frame. While the world's paused, attacks logged from her skill replay as damage. That's the engine under the hood.
What feeds the engine is the timepiece gauge, and I expected a trap here. According to a community explainer thread on r/NevernessToEverness, the gauge caps at 120, regenerates 6 per second, and her ultimate spends the whole 120. A full refill from empty, then, runs about 20 seconds. Her skill costs 60.
And the surprise is this: the gauge isn't your bottleneck once you read the cadence right. A 20-second refill against a 12-second freeze means the number worth managing is your downtime between stops, not the price tag on the ult. The lazy take, "120 gauge, yikes, expensive," misreads the whole loop. You've got an eight-second gap to fill with off-field or support pressure before the next window cracks open. Reframe the build around that gap and everything changes. You're not solving for burst. You're solving for those eight seconds.
| Aspect | Detail |
|---|---|
| Ultimate | 12s time stop, no character switch, skill attacks replay |
| Gauge | 120 max, 6/sec regen (≈20s full refill) |
| Energy | Skill 60, Ult 120 |
Source: YouTube kit video + r/NevernessToEverness explanation thread (2026) [community]
Building for the gap, not the burst

I rolled her twice. Once leaning all-in on attack, once locking crit and energy ahead of everything else. The split landed exactly where the gauge math said it would: in whether the next freeze actually fired on schedule.
The stat-priority consensus the community settled on, per the LDShop Hotori build guide, reads Crit DMG > Crit Rate > ATK% > Energy Recharge. For pure output, that order is fine. The problem is it parks the most reader-protective stat in fourth. Energy recharge isn't a damage line, it's an uptime line, and on a character whose whole identity is pressing ult the instant it's up, uptime is damage. Watching both builds back to back, the pattern was plain: under-invest recharge and you start clipping rotations, and one skipped freeze costs far more than the ATK% you bought instead. That same mistake gets flagged constantly across r/NevernessToEverness Hotori threads, people building her with too little recharge, then watching freeze windows evaporate.
So the priority I'd actually hand someone who just pulled her looks like this:
- Crit Rate first, at low investment. It's her most contested stat and the most undervalued early. Below a usable crit threshold, the replayed skill hits land inconsistently and the whole burst feels like a coin flip.
- Crit DMG to scale once your crit chance stops betraying you.
- Enough Energy Recharge to guarantee the next stop. A floor, not a leftover.
- ATK% in whatever slots remain.
On gear, her signature Arc, Marching Beyond Time, sits best-in-slot according to the Game8 Hotori build guide. It genuinely is her strongest weapon. But "strongest" and "mandatory" are separate claims, and I'll come back to that.
The line I'll defend against the grumbling: piling on attack at the expense of freeze uptime is the most common build error on this character. Raw attack does precisely nothing for those eight exposed seconds. Recharge is what closes them.
The rotation guides keep over-engineering
I ran the elaborate multi-step rotations floating around community videos, then stripped the whole thing back to bare cadence. Identical results. The skill on Hotori is energy timing, not memorizing a ten-input combo string.
The cycle that genuinely matters has three beats:
- Pre-stop setup. Get your support's buff live before you hit ult, because once the freeze starts you cannot swap characters. Buff, then freeze. Players who freeze first and scramble to slot a support in afterward physically can't, and the window dies on the vine.
- Burst inside the freeze. Land your skill so its hits bank into the replay damage. This is the payoff. Everything before exists to make these seconds pay.
- Reset the gap. A ~20-second refill against a 12-second stop leaves roughly eight seconds of naked downtime. That's the stretch your team has to carry.
Two buried interactions showed up that the basic guides wave past, and both reward sequencing. First, in a Blossom-style comp (the lineup LDShop floats, pairing her with a main DPS, sub-DPS, and supports), a community video flagged that up to six blossoms can keep shooting the enemy during the time stop, an undocumented off-field source that quietly converts the freeze into team-wide free damage. Second, several guides note her ult pauses timers in forced encounters, which a GameFAQs board post says saves real clock time in timed Abyss-style modes. Not a damage buff. A clear-rate buff, and on a leaderboard mode, that's a bigger deal than it sounds.
When the solo-carry framing collapses

This is the part where my assumptions broke. Run Hotori alone, no fast-buffing support, no off-field pressure covering the gap, and the "best Abyss carry" reputation just dissolves. Her dominance is real. A meaningful slice of it, though, is borrowed from whoever fills her freeze window.
The community split tells the story straight. One camp, mostly the kit-explainer crowd on YouTube, calls her broken on control and damage replay. The other, voiced in Reddit threads, calls the time stop a gimmick if she's built without proper energy. Both are right inside their conditions, and the reconciling read is that there's strong agreement she's strong with the correct build and a support to fill the gap. That conditional is the entire story. Icy Veins files her as an S-Rank Cosmos Solid character, with writer Emi framing her as "a strong S-Rank Cosmos support with unique time mechanics." Notice support doing work in that sentence. Even a tier-3 outlet is hedging away from calling her a pure hypercarry.
So which shell do you build?
| Team shell | Core idea | Who it's for | Cost |
|---|---|---|---|
| Hypercarry (Blossom) | Hotori on-field, blossoms + supports feed the freeze | Players chasing fastest clears | Highest — wants signature Arc |
| Dual-DPS | Hotori freeze burst + a second carry covering the ~8s gap | Players with a strong second unit | Medium |
| Budget / F2P | Hotori + any fast-buffing support, F2P weapon | Zero-spend endgame | Lowest |
Source: LDShop build guide + community team guides (2026) [community]
The one non-negotiable across all three: a support that buffs fast enough to land before the freeze drops. That's the gate. The rest is optimization.
The F2P run, and where the signature weapon earns its slot

I'll keep it blunt. A signature-less F2P Hotori cleared everything I threw at her, but every run lived or died on the support, not on her own gear.
Community guides agree here. For F2P, chase the signature Arc if you can land it, otherwise lean on solid F2P alternatives and aim a time-stop nuke roughly every 20 seconds, matching that gauge refill. The "every 20 seconds" cadence is the whole F2P promise, and it holds as long as your recharge stays above the floor I described earlier.
The honest with-versus-without:
| Setup | What you gain | What you lose |
|---|---|---|
| With Marching Beyond Time | Best-in-slot output, smoother gauge cycling | A limited-banner pull |
| F2P weapon + high recharge | Reliable ~20s time-stop cadence, full clears on most content | Top-end burst ceiling |
Source: Game8 build guide + community F2P guides (2026) [community]
My read: the Arc lifts her ceiling, not her floor. If you're clearing endgame rather than fighting for a leaderboard spot, the F2P shell plus a good support gets there. Where the weapon repays the pull is gap-cycling. It smooths the recharge so you clip fewer windows, and that compounds across long timed fights.
Who should actually pull her
Hotori arrived in the second half of version 1.0, a May 2026 window per several banner guides, so timing your pulls around that rerun cadence matters more than sprinting in. Sorted by player profile:
- F2P (zero spend): Worth it if you already own a fast-buffing support. The preview-guide consensus has her shining for time-stop burst in Abyss specifically when you're missing similar supports, so if your roster's hole is "control and burst," she plugs it. Missing the enabler? Then you're pulling half a unit, and I'd sort out the support situation first.
- Low-spender (monthly pass): The comfiest bracket by far. Skip the signature, funnel the saved pulls into a support, build her around recharge. You land the F2P-viable cadence and dodge the whale tax.
- Whale / collector: Grab the Arc, run Blossom hypercarry, enjoy the off-field blossom trick. This is the bracket where the weapon's gap-smoothing turns into leaderboard seconds.
If you're planning to pull and want to sort the recharge investment before the banner hits, you can handle a Neverness to Everness top up through VGTopup as one route. Just settle one question before you commit, whether your roster has the support to make her worth it, because that call weighs more than the pulls themselves.
She's a strong pull for endgame players and genuinely skippable for casual content, where a 12-second freeze is overkill against enemies you'd erase anyway.
The mistakes that quietly tank her
Four traps account for most of the underwhelming Hotori runs out there, and every one is a build-or-timing error, not a skill-ceiling problem:
- Neglecting energy recharge until rotations skip the freeze window outright. The most documented mistake in community threads, and the priciest.
- Stacking ATK% past diminishing returns while crit chance is still flaky, which leaves the burst inconsistent.
- Pressing ult before the support buff lands, then realizing mid-freeze you can't swap anyone in.
- Running her with zero off-field or support coverage, leaving that ~8-second gap wide open.
Fix the energy floor and the buff-before-freeze ordering, and most of the "she's overrated" chatter quietly fixes itself.
Frequently Asked Questions
How long does Xun's time stop actually last, and how often can I use it?
The freeze runs 12 seconds, per the YouTube kit breakdown, and the gauge refills at 6 per second to a 120 cap, so a full recharge from empty lands near 20 seconds. Practically, that's one time stop per 20-second cycle, with about eight seconds of exposed downtime between windows for your team to cover.
Is Xun worth pulling for F2P players?
Conditionally. She's at her best for F2P specifically when your roster lacks comparable control-and-burst supports, per preview guides. Already own a fast-buffing support to fill her freeze window? Then she's a clean addition. If you don't, you're pulling half a kit and would be smarter securing the enabler first. The signature Arc raises her ceiling, it isn't a requirement for clears.
Does Xun need her signature weapon to perform in Abyss?
No. Marching Beyond Time is best-in-slot per Game8, but a high-recharge F2P build still fires a time-stop nuke roughly every 20 seconds and clears most endgame content. The weapon mainly smooths gauge cycling so you clip fewer windows, which matters most in long timed fights and leaderboard chasing, not for ordinary clears.
Crit Rate or ATK% — what should I prioritize?
The published order runs Crit DMG, then Crit Rate, then ATK%, then Energy Recharge, per the LDShop guide. But at low investment I'd front-load Crit Rate so her replayed skill hits stop being a gamble, and treat recharge as a non-negotiable floor rather than a final slot. Uptime is damage on a character built entirely around pressing ult on cooldown.
Why does my time stop sometimes feel like it accomplished nothing?
Almost always one of two timing slips. Either you pressed ult before your support's buff was live, and you can't swap characters mid-freeze to salvage it, or your recharge ran too low and you skipped the window entirely. Buff first, freeze second, keep recharge high enough that the next stop fires on schedule.


Comments