Master the 2026 Racing Master beginner guide with a 7-day upgrade roadmap. Avoid starter car traps, build Ranked Points, and dominate tracks early.
Winning races in Racing Master comes down to math, resource discipline, and clean lines. Many new drivers blow through early Gold and tuning kits on the first shiny coupe pulled from the Auto Expo, hitting a wall in ranked matchmaking by day four. The game feels generous on day one, handing out rewards across every menu. That generosity dries up fast.
Scatter your materials across six chassis and your garage stalls. You need a focused progression path to stay competitive, push your Ranked Points upward, and bypass early resource traps.
The Three-Category Ranked System Explained
Racing Master does not calculate your competitive standing from your fastest supercar. Matchmaking rates your driver profile using an average across three categories: Standard, Sports, and Extreme.
Some regional releases label the Extreme category as "Radical." Regardless of naming, the underlying rule holds. Dumping every scrap of currency into an Extreme-class hypercar while leaving Standard and Sports rides at factory spec tanks your overall rating. Your Ranked Points (RP) represent the mean average of your performance across all three brackets. Neglect a single division and your account rating plummets, no matter how many podiums you take in hypercar lobbies.
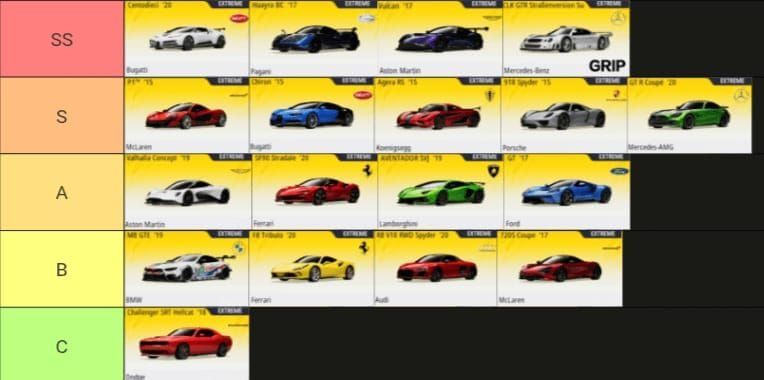
The table below details baseline performance figures and representative platforms for each division available during your initial campaign.
| Vehicle Category | Class Role | Benchmark Entry Vehicle | Baseline Performance Rating | Engine Configuration |
|---|
| Standard | Technical circuits, street layouts | Nissan Skyline GT-R '89 | 802 PR | Twin-turbocharged L6, 280 hp |
| Sports | High-speed sweepers, mid-tier tracks | McLaren 570S Coupe '16 | 909 PR | Twin-turbocharged V8, 570 hp / 600 Nm |
| Extreme | Ultra-high-speed sprint tracks | Hypercar tier (e.g., Bugatti Chiron) | 950+ PR | Multi-cylinder high-displacement |
Takeaway: You must build one dedicated primary vehicle for Standard, Sports, and Extreme classes simultaneously to keep your average Ranked Points climbing evenly.
Later tournament play requires up to six built cars per category to counter track rotations. Ignore that requirement during your opening seven days. Spreading parts across six cars per class chokes your inventory. Pick one designated starter per class and drive it straight to competitive viability before touching secondary models.
Days 1 to 3: Establishing Your Core Garage
Clear the opening tutorial tracks and the Auto Expo gacha opens immediately. These first three days determine whether your account stays ahead of the competitive power curve or runs out of parts.
The pull system operates on clear guarantees: you get at least one Rare vehicle within 10 drawings, while hitting 100 drawings guarantees a Legendary vehicle. Early on, players often assume an unranked Legendary pull instantly outclasses everything in their garage. It does not.
Day 1-3 Focus Flow:
[Tutorial Clear]
       │
       ▼
[Auto Expo 10-Pull] ──► Lock in 1 Rare Car per Class
       │
       ▼
[Level 5 Part Push] ──► Target 5/5 on Engine, Tires, Electronics, Chassis, Body
       │
       ▼
[Halt Tuning Sliders] ──► Keep all balance sliders strictly at Factory Default
Step 1: Secure Your Three Anchors
Skip chasing promotional banners right away. Pull your initial tickets, inspect what drops, and assign one operational chassis to Standard, Sports, and Extreme. The Nissan Skyline GT-R '89 delivers a baseline 802 performance rating powered by a 280 hp twin-turbo L6 that controls early Standard brackets. If your Sports pull yields the McLaren 570S Coupe '16, its 909 rating and 600 Nm of torque handle early driver leagues.
Step 2: The Level 5 Baseline Target
Each machine relies on five core upgradeable modules:
1. Engine
2. Tires
3. Electronics
4. Chassis
5. Body
Push all five components to level 5 on your three primary cars. Avoid boosting one component to level 10 while leaving the rest at level 1. Racing Master calculates handling dynamics across all systems simultaneously; an over-tuned engine paired with level 1 tires and stock suspension produces catastrophic understeer and wheelspin.
Step 3: Complete Campaign Chapters and Club Joining
Push through story milestones to unlock daily missions and match lobbies, then join an active Club immediately. Active member participation levels up the Club, unlocking member vehicle tuning profiles and rare component discounts in the Mall. The Club shop discounts save critical Gold reserves when upgrades get expensive on day four.
Days 4 to 7: Upgrade Priorities and the 25/25 Rule
By day four, free level-up crates thin out. Upgrading components past level 5 consumes substantially more Gold and tuning parts. This is where drivers ruin setups by tampering with custom tuning sliders.
Component Allocation Priority Order:
1. Tires (Grip and traction recovery)
2. Engine (Top-end acceleration and straight-line speed)
3. Chassis (Corner stability and weight transfer)
4. Electronics (Launch control and assist calibration)
5. Body (Aerodynamic balance and top-speed drag reduction)
Tires come first. Power without lateral grip creates massive lap time penalties. Once your tires maintain traction through corners, feed materials into the engine, followed by chassis, electronics, and body.
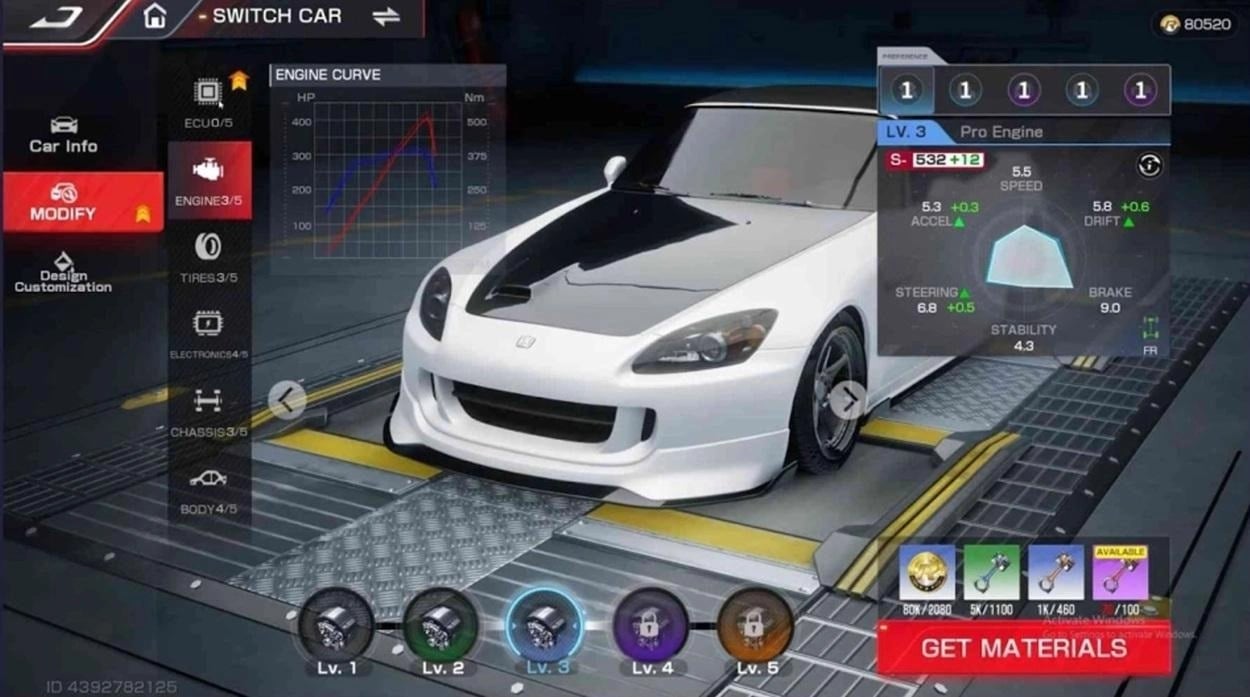
The Absolute 25/25 Rule
Every car features five upgrade tiers across five parts, creating a complete 25/25 cap. Until you install every single part to reach that 25/25 ceiling, leave all performance sliders on their default factory settings.
Do not adjust engine response, tire friction balance, suspension stiffness, or steering angle ratios early. Racing Master provides each vehicle a limited quota of free tuning adjustments. Once those expire, testing adjustments consumes parts and currency.
Modifying mechanical sliders on an incomplete chassis introduces handling quirks that vanish once full parts are installed anyway. Save your free adjustments until the vehicle reaches its 25/25 cap.
ECU Blueprints: The Rare vs Legendary Myth
A stock Legendary car does not automatically beat a built Rare car.
Duplicate vehicle pulls from the Auto Expo convert directly into vehicle-specific blueprints. These blueprints upgrade the car's Engine Control Unit (ECU) across six tiers, from ECU 0 to ECU 5.
Each ECU tier raises baseline efficiency, adds passive handling improvements, and sharpens throttle response. Pulling enough copies of a Legendary car to reach ECU 3 requires massive spending. You will naturally pull duplicate Rare cars through ordinary mission progression.
| Car Platform | Native Rarity | ECU Level | Competitive Parity & Performance Outlook |
|---|
| Chevrolet Corvette C8 | Rare | ECU 3 | Matches or exceeds baseline ECU 0 Legendary vehicles |
| Lotus Exige Cup 430 | Rare | ECU 3 | Superior corner exit speed compared to stock hypercars |
| Stock Pull Exotic | Legendary | ECU 0 | High theoretical ceiling, but hindered by low baseline ECU output |
| Maxed Starter Pick | Rare | ECU 5 | Dominates mid-tier ranked lobbies through blueprint stat scaling |
Takeaway: High-tier Rare cars like the Corvette C8 and Lotus Exige Cup 430 at ECU 3 easily outperform baseline ECU 0 Legendary cars due to blueprint stat multipliers.
Funnel early materials into an ECU 3 Chevrolet Corvette C8 or Lotus Exige Cup 430 to outpace stock Legendary cars in ranked lobbies. When you need supplemental pull resources to hit critical banner milestones, you can acquire extra Diamonds through Racing Master packs to secure needed duplicates before weekly event timers reset.
Auto Expo Economy and Coupon Management
Every container pull in the Auto Expo yields green coupons alongside vehicles. These coupons serve as bad-luck protection, letting you trade directly for specific vehicles in the exchange shop instead of relying purely on gacha rates.
Some community guides claim a flat fee of 160 Expo Points buys any vehicle. The live release structure uses a tiered pricing system based on vehicle class brackets.
| Class Tier Redemption | Exchange Shop Cost | Target Vehicles in Pool | Optimal Acquisition Strategy |
|---|
| Standard Class | 120 Green Coupons | Nissan Skyline GT-R '89, Ford Focus RS | Skip with coupons; rely on natural ticket pulls |
| Sports Class | 160 Green Coupons | McLaren 570S Coupe '16, Lotus Evora GT430 | Redeem only if missing a dedicated Sports anchor |
| Extreme Class | 240 Green Coupons | Bugatti Chiron, Ford GT, Aston Martin Vulcan | Prime redemption target; save all coupons for this tier |
Takeaway: Never spend green coupons on Standard class cars; hoard your tokens until you hit 240 to directly secure a top-tier Extreme hypercar.
Never buy 120-coupon Standard cars. Standard vehicles drop regularly from tickets, events, and milestone crates, making exchange currency spend here inefficient.
Bank green coupons until you hit 240, then acquire an Extreme platform like the Bugatti Chiron, Ford GT, or Aston Martin Vulcan. This directly fills your third ranked slot with a top-tier hypercar without waiting on a 0.5% banner pull.
Driving Physics: Drop the Arcade Habits
Racing Master uses a handling engine co-engineered with Codemasters. It penalizes arcade driving habits. Ripping the e-brake to slide sideways through every turn will cost you races.
Arcade Style vs Clean Racing Line Results:

[Arcade Full Drift]
  ├── Destroys tire surface friction
  ├── Triggers aggressive stability-assist throttling
  └── Kills corner exit acceleration (Slow Lap Times)

[Clean Braking Line]
  ├── Brake straight before turn-in
  ├── Hit apex with neutral throttle
  └── Accelerate out on wide track-out path (Fast Lap Times)
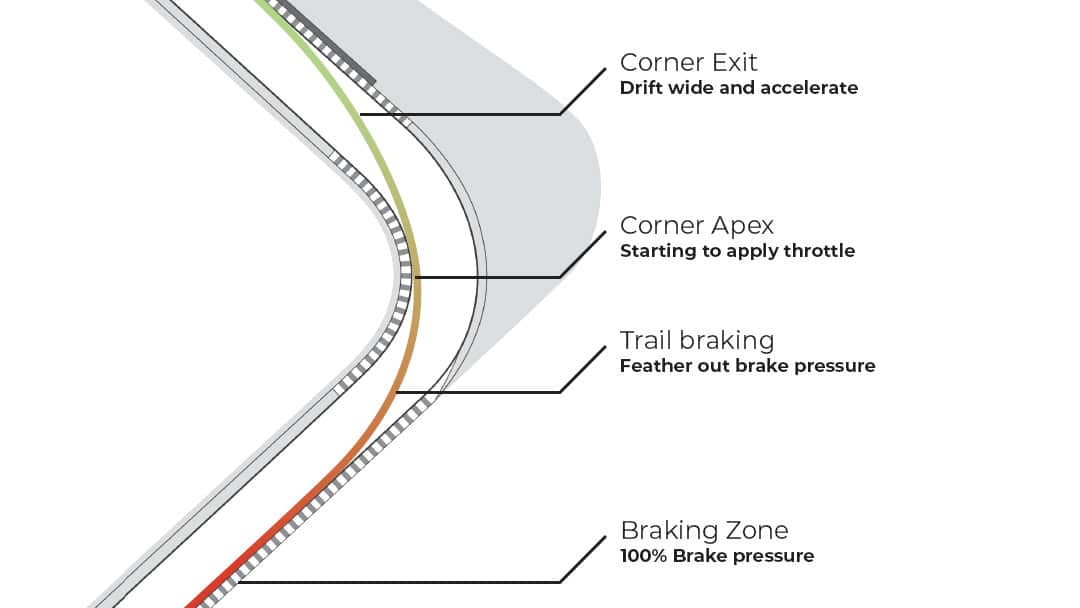
Drifting overheats the tire surface, scrubs exit velocity, and triggers stability assists that cut engine power to regain traction. To drop lap times on technical circuits, rely on track fundamentals:
- Brake in a straight line before turning the wheel.
- Ease off the brake as you rotate the nose toward the apex.
- Clip the inner rumble strip without jumping the curb.
- Roll onto the throttle as you unwind the steering wheel on exit.
Smooth inputs keep the engine inside its powerband. Extracting speed from the McLaren 570S requires keeping the rear tires hooked to the tarmac rather than spinning them into smoke.
Surviving Ranked Knockout and Seasonal Resets
Once your primary trio hits level 5 components, enter ranked matchmaking. Knockout Ranked Mode filters drivers through an elimination bracket across three rounds:
- Heat 1: 32 drivers take the green flag. Only the top 50% (16 drivers) advance.
- Semi-Final: 16 drivers compete. Only the top 50% (8 drivers) make the cut.
- Final Round: 8 drivers fight for podium placements and maximum RP rewards.
Surviving Heat 1 requires clean lines over reckless overtakes. Avoid opening-lap contact in turns one and two, let over-aggressive drivers collide with the barriers, and lock down a top-16 finish.
Watch seasonal reset rules as you climb. The ranked ladder applies a reset threshold at 1,200 Ranked Points. Vehicles below 1,200 RP retain their full point balances when a competitive season concludes. Vehicles at or above 1,200 RP receive point deductions based on your driver tier.
If a car sits at 1,190 RP near the final days of a season, crossing 1,200 right before reset invites an immediate reduction. Bring all three classes into the 1,150–1,199 range first, then push them past the threshold together during your mid-season push.
To match optimized opponents in higher brackets, you can secure Diamonds and Gold via Racing Master top-up to fund late-stage parts crafting without waiting on daily stamina timers.
Daily Mod Parts Farming and Club Routine
A disciplined daily routine collects all available Gold and component boxes from game modes.
Daily First-Week Checklist:
[ ] Clear all Daily Resource Trials (Tire/Engine parts)
[ ] Run 3 Club Practice Sessions to generate Mall tokens
[ ] Claim free daily Auto Expo supply crates
[ ] Check Club Store for discounted Level 4/5 Upgrade Kits
[ ] Run 5 Ranked Matches to maintain Category Point parity
Never cap your daily trial stamina. Prioritize tire and engine material stages, as those components require double the inventory volume of body or electronics parts.
Active clubs unlock heavy discounts on upgrade kits in the in-game Mall. Spending Club tokens on materials preserves Gold for vehicle upgrades instead of retail store packs.
When limited banners arrive with tuning parts or blueprints, you can pick up discounted packs for Racing Master to maintain consistent part levels without draining pull savings.
FAQ
Which car should I upgrade first during my first week in Racing Master?
Pick a single all-around vehicle in each category (Standard, Sports, Extreme) and upgrade only those three. Spreading tuning materials across a wider collection under-levels your entire garage and stalls your ranked climb.
How does the vehicle gacha pity system work?
The Auto Expo uses fixed milestone guarantees. You receive at least one Rare vehicle within 10 pulls and a guaranteed Legendary vehicle within 100 pulls, while accumulating exchange coupons on every pull.
No. Leave tuning sliders at default settings until the vehicle hits its complete 25/25 parts cap. Adjusting sliders before parts are maxed out consumes limited free attempts and creates handling imbalances.
What happens when I pull duplicate cars from containers?
Duplicate cars automatically convert into vehicle-specific blueprints. These blueprints advance the vehicle's ECU rating from level 0 to level 5, providing stat increases and handling improvements.
Can Rare vehicles compete effectively against Legendary cars?
Yes. Rare platforms like the Chevrolet Corvette C8 or Lotus Exige Cup 430 match or beat stock Legendary cars once upgraded to ECU 3. Because Rare duplicates drop more frequently, leveling their blueprints is far faster for early accounts.
How is my overall competitive rank calculated in Racing Master?
Your competitive rank represents the average Ranked Points accumulated across Standard, Sports, and Extreme categories. Focusing exclusively on one category drags your overall tier down.
Why should I join a Club during my first week?
Clubs give you access to proven tuning setups and shared team events. Member activity also raises the Club level, unlocking discounts on high-tier upgrade components in the Mall.
The 7-Day Tuning Blueprint
Success in your opening week comes down to garage discipline. Avoid spending Gold on every fresh vehicle pull, hoard green coupons until you can buy an Extreme-tier car for 240, and upgrade one machine per class to level 5 parts before touching tuning sliders.
Respect the Codemasters physics engine by braking straight and hitting apexes smoothly. Keep your three vehicle classes balanced to raise your average Ranked Points, and your account will advance steadily through competitive ranked tiers.










Comments