
Fastest Anniversary Fresh-Start Route in Wuthering Waves
The 2nd Anniversary patch dropped a wall of free rewards behind a Union Level 14 gate, and if you boot the game cold on patch day you can still clear that gate inside an afternoon. The trick is that the early story is wide enough that a new account can skip half of it by using the "early experience" jump menu, ride a trial Resonator through the boss content, and pocket the activity points along the way. What follows is the exact path I ran, with the corners that actually save time called out instead of the padded "tap A, tap B" stuff most fresh-start checklists give you.
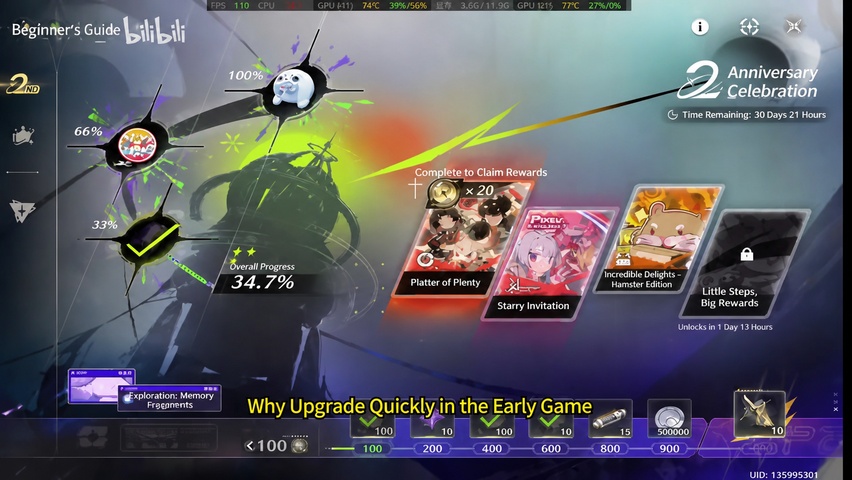
Why the Level 14 Wall Matters
The anniversary rewards aren't trivial. The 2nd Anniversary, tied to Version 3.3, runs from May 2, 2026 at 10:00 to June 7, 2026 at 11:59 server time, and pays out 1,200 Astrite, one Phantom: Reactor Husk, the Supernova Launcher title, five Modifiers, 100 Premium Tuners, 500 2nd Anniversary Coins, 670,000 Shell, plus extra crafting components. Anniversary Coins also come from time-limited objectives, daily logins, and missions, and they're spent in the event shop, so every day you sit below the level gate is a day of compounding loss.
On top of that, Version 3.3 Phase 1 (April 30 to May 21, 2026) is running Hiyuki as a new 5-star Glacio sword alongside Mornye and Iuno reruns, and Phase 2 (May 22 to June 7, 2026) brings Chisa and Phrolova back. Astrite saved during the anniversary directly translates into pulls on these banners, so the math heavily favors rushing the gate rather than sightseeing through the opening arc.
Opening Movement Through Jinzhou
Follow the main quest out of the tutorial. After the first patrol mob, there is a chest sitting right on the path — grab it, don't detour. From there the questline pulls you to the central beacon of Jinzhou; on the way, ping the two minor beacons that sit along the road. Beacons are the only fast-travel anchors that matter in the opening hours, and missing one forces a long return run later.
A short distance past the central beacon, a popup appears offering an "early experience" jump to Ninashita Chapter 2. Take it.
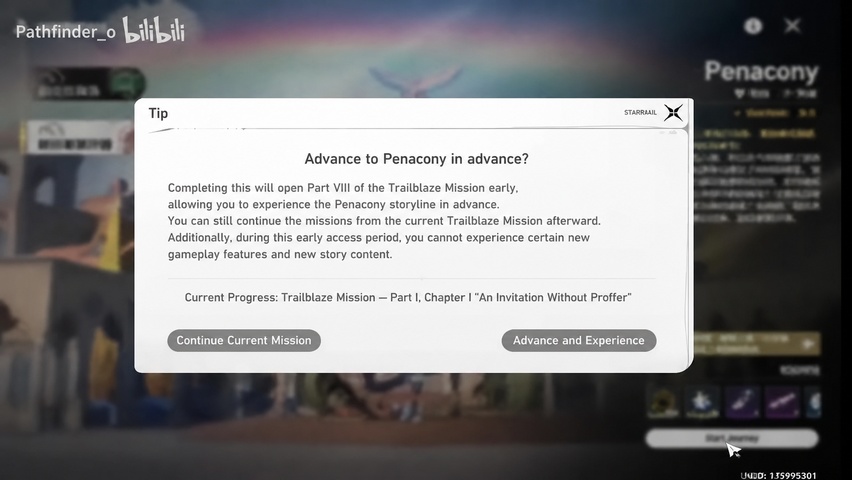
The point of this jump is to unlock Rover's second form and the first-form Spectro lighting effect early so combat stops feeling like you're swinging a stick. Per the dossier the Havoc form is normally locked behind the "Grand Warstorm" quest in Act VI with a Union Level 21 requirement, so the early-experience door is the fastest legal shortcut into Havoc Rover that exists.
Don't forget the chest tucked behind the piano in the cutscene area. Then open the quest menu, set "Echoes of the Past" as your tracked objective, and warp directly to the NPC instead of running surface paths.
Sanhua, Huaxu Lab, and the Flight Unlock
Push the Chapter 1 story until the Sanhua conversation finishes. After the dialogue closes, open the map, tap the yellow-blue tome marker, and warp outside the door — it's a one-tap skip past a long indoor corridor. Keep pushing the main story until the New Tide Shadow event opens up, then slot the free story Resonator into your team and switch Rover to Havoc form. Level Rover to 20 before the next stretch.
Keep going until you exit Huaxu Laboratory, then stop pushing the main quest. Backtrack and pick up the flight side quest. Once that's done, the soaring module is permanent.
Fly back up, ping one small beacon at altitude, and drop back down. The NPC waiting nearby runs a short obstacle minigame. The somersault input that trips most players is simple: walk forward off the ledge, release the W key, then tap the right mouse button — that's the backflip motion. Clear the activity for six chests, which is meaningful starter currency for early ascensions.
Skipping the Scar Conversation
The Scar encounter is a notorious time sink because the lamb monologue is several minutes long with full animation. You don't have to sit through it. The dossier confirms that selecting "(Attack Him)" twice skips straight to the fight, and that Scar offers one final back-out prompt before swords are drawn. If you'd rather hear the impressed flavor lines without losing the combat trigger, the verified answers are "The white lambs" for the real culprit and "Their lives" for the price paid — both choices affect only impressed dialogue, not the story outcome.
For pure speed, hammer the second option. You'll be swinging at him in under a minute.
Daily Activity Points and Boss Farming to Level 10
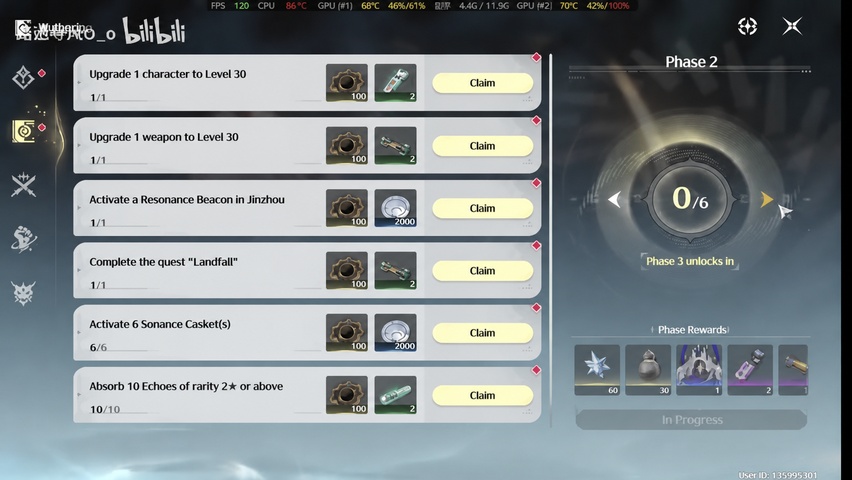
Push the main story until the Activity quest panel unlocks. Claim what's already been auto-completed and finish one daily mission to top off.
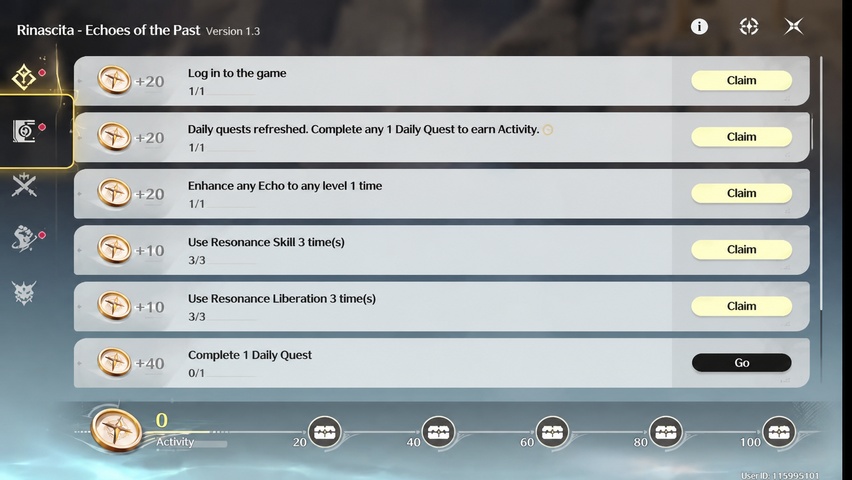
Daily tasks award randomized Activity Points and reset at 04:00. Rewards claim at every 20 AP up to a 100 AP / five-tier cap; the 20 AP tier alone is 10 Astrite, 300 Union EXP, and 2 Medium Resonance Potions, and the full 100 AP clears the day's Astrite and Union EXP.
By this point you should be a hair short of Union Level 10. Once you cross Level 10 you can engage World Bosses, and the first kill on each pays 500 EXP plus a guaranteed Echo drop. The dossier lists nine fixed-lair World Bosses across the map: Crownless, Tempest Mephis, Thundering Mephis, Inferno Rider, Feilian Beringal, Mourning Aix, Impermanence Heron, Lampylumen Myriad, and Mech Abomination. You don't need all nine for this route — you need enough first-kill bonuses to bridge the EXP gap.
To hit Level 10 fast, warp to a beacon near a cluster of bosses, glide between perches, drop into the cave shortcut, and unlock the next beacon at the bottom — that beacon ping is usually the last bit of Union EXP you need before the first boss pull. Aggressive Echo collection is also doing double duty here: the dossier notes that hoovering Echoes raises Data Bank tier and lifts future drop rates and rarities, and the first ten Data Bank levels also bump stamina capacity.
Rover to Level 40 and the Changli Trial
The bosses you actually want first-kill bonuses on will gate at Lv30+, so before the run you need Rover at Level 40 with a serviceable weapon. Slap on any blue-tier rectifier or sword you've pulled and ascend Rover through the 20/40 breakpoints. The dossier confirms that ascension breakpoints sit at Lv20/40/50/60/70/80, and that the upgrade materials needed at this stage are buyable straight from the shop, so you don't need to grind Whisperin Echoes yet — those become a problem at Lv50+ when you start chasing the LF / MF / HF / FF Whisperin Core path toward Lv90.
Once Rover is at 40, drop the trial Changli into the second slot and start swinging.
| Resonator | Element | Weapon | Role on this run |
|---|---|---|---|
| Rover (Havoc) | Havoc | Sword | Main carry, sub-DPS depending on rotation |
| Trial Changli | Fusion | Sword | Main DPS for the boss loop |
| Story free Resonator | — | — | Outro buffer / energy battery |
Changli is the right trial to lean on because her damage doesn't depend on signature gear. Her Forte Circuit, Flaming Sacrifice, builds up to four Enflamement stacks from Basic Attacks in True Sight stance or after Liberation, then consumes those four stacks on a Heavy Attack for a Skill DMG hit reaching roughly 500% at high levels, with 40% damage reduction during the cast. Her Basic Attack string activates True Sight for 12 seconds, the Resonance Skill dash also enters True Sight for 12 seconds with two charges on a 12 second recharge, and her Liberation can be cast in mid-air, drops her into Fiery Feather for 10 seconds, and ends on Flaming Sacrifice for a +25% ATK kicker. Passive stacking gives 5% Fusion DMG per Enflamement stack on True Sight hits and a flat 20% Fusion DMG plus 15% DEF on Flaming Sacrifice and Liberation. Even on a trial loadout, that scales hard enough to dump World Bosses well above your own level.
Crossing the Level 14 Gate
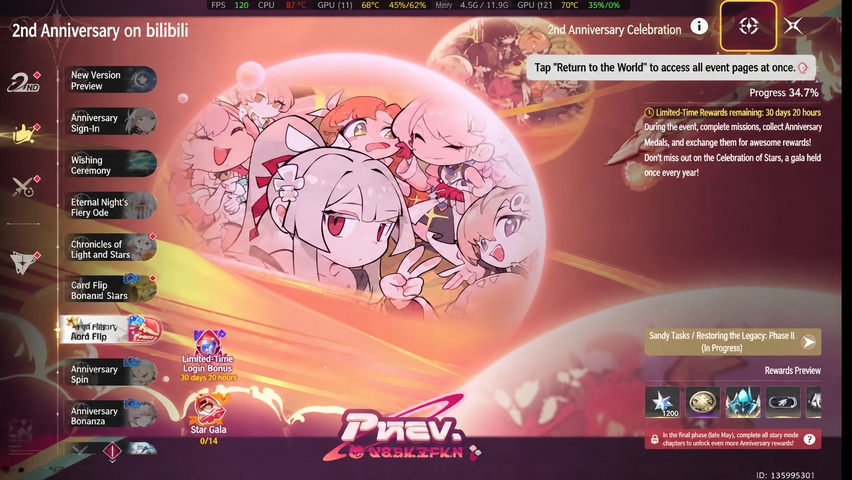
After the boss loop, hit F2 to open the Wanderer's Log. Claim every pending stage reward to convert the boss EXP into Union EXP.
That claim is usually what carries you from 13 to 14. Open the Events panel, hit the prompt to warp to the anniversary hub, sit through one short cutscene, and the entire anniversary track unlocks at once.
While you're catching your breath, burn through the active redeem codes. They go through Menu → Settings → Other Settings → Redeem and each one is single-use per account, with Union Level 2 (Chapter 1 Act 1 cleared) as the minimum. The Astrite-bearing codes worth typing in immediately:
- ILLUSIONHAUNTS — 100 Astrite, 4 Premium Resonance Potion, 5 Advanced Energy Core
- DREAMSPERSIST — 100 Astrite, 2 Forgery Premium Supply, 40,000 Shell THISISFINALE — 100 Astrite, 1 Weekly Challenge Supply Pack, 2 Advanced Sealed Tube
- WHOAMI — 100 Astrite, 3 Advanced Enclosure Tank, 20,000 Shell IMPERATOR — 100 Astrite, 3 Advanced Resonance Potion, 2 Medium Revival Inhaler
- LEVIATHAN — 100 Astrite, 3 Advanced Energy Core, 2 Medium Nutrient Block
- SETSAIL — 100 Astrite, 3 Advanced Enclosure Tank, 20,000 Shell VAULTOPS — 100 Astrite, 3 Advanced Energy Core, 2 Medium Nutrient Block
- TREASUREHUNT — 100 Astrite, 3 Advanced Resonance Potion, 2 Medium Revival Inhaler
- JOINCARNEVALE — 100 Astrite, 20 Premium Tuner, 5 Advanced Sealed Tube
- OFFWEGO — 100 Astrite, 40,000 Shell, 2 Forgery Premium Supply
- GETREADY — 100 Astrite, 2 Premium Resonance Potion, 5 Advanced Energy Core
- WUTHERINGGIFT — 2 Premium Resonance Potion, 2 Medium Revival Inhaler, 2 Medium Energy Bag, 10,000 Shell, 50 Astrite
- WUWA4PC — 50 Astrite, 20,000 Shell BLACKSHORES, SHOREKEEPER, FORYOU — 100 Astrite each
That stack of code Astrite plus the anniversary's 1,200 Astrite plus your tier rewards is enough to take a serious swing at Hiyuki's Phase 1 banner.
What to Spend the Anniversary Astrite On
A fresh account also gets the Novice Convene, Utterance of Marvels, which offers 50 pulls at a 40 Lustrous Tide cost — a 20% discount on standard pulls. Clear that banner first before touching the limited 5-star banners with anniversary currency. After Novice, the decision tree for Version 3.3 looks like this:
| Banner Window | Featured 5-stars | Notes |
|---|---|---|
| Phase 1 (Apr 30 – May 21) | Hiyuki (new, Glacio sword), Mornye (rerun, Fusion broadblade), Iuno (rerun, Aero gauntlet) | Hiyuki is the only new unit in 3.3 |
| Phase 2 (May 22 – Jun 7) | Chisa (rerun, Havoc broadblade), Phrolova (rerun, Havoc rectifier) | Two Havoc reruns back to back |
| 3.4 Phase 1 | Lucy (Spectro gun, collab limited), Rebecca (Electro gun, collab limited) | Collab units leave with the patch |
| 3.4 Phase 2 | Lucilla (new Glacio rectifier), rerun TBC | Glacio rectifier slot finally fills |
Two practical notes from the dossier carry over here. First, never let Waveplates cap — spend them on Combat Simulations, Boss Challenges, and Forgery Challenges so your daily resource generation isn't wasted while you're chasing rewards. Second, hoard Crystal Solvents for the SOL3 Phase that comes later, and concentrate ascension materials on three to five Resonators rather than thinly spreading them across the whole roster. Rerolling the Novice Convene is reasonable if your early pulls miss the unit you actually planned the team around.
That's the whole loop: skip into Ninashita Chapter 2, drag Rover to Havoc form, clear flight, punch Scar without sitting through the monologue, harvest first-kill boss EXP, push Rover to 40, claim Wanderer's Log EXP into Level 14, and walk straight into the anniversary panel before the limited reward timer eats too much of the 30-day window.


Comments