Wuthering Waves 3.3 Endgame Tier List: Cartethyia + Lupa Sneaks Into T1 While Aemeath and Hiyuki Lock T0
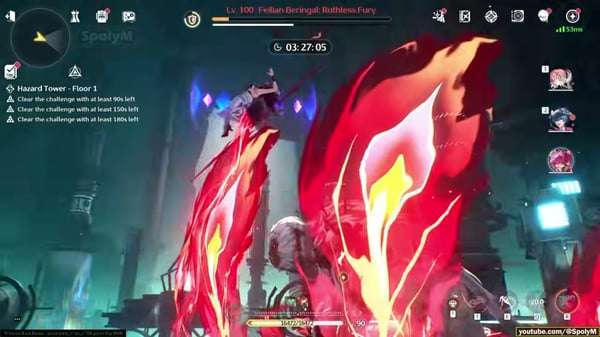
A hundred hours into the 3.3 endgame and the bosses have made one thing painfully obvious: paper DPS is a lie. The new flying "spaceman" boss and the bigger "Furnace Core" husk machine keep yanking...
Wuthering Waves 3.3 Endgame Tier List: Cartethyia + Lupa Sneaks Into T1 While Aemeath and Hiyuki Lock T0
A hundred hours into the 3.3 endgame and the bosses have made one thing painfully obvious: paper DPS is a lie. The new flying "spaceman" boss and the bigger "Furnace Core" husk machine keep yanking carries out of their combos with fast-slow swings, forced backsteps, and a permanent invitation to eat an elbow mid-rotation. So the only fair way to rank teams right now is the way most players actually run their boxes: three five-stars, main carry at S0R1, sub-carry at S0R0, and judged on what actually lands in the arena. That's the lens used throughout this list.
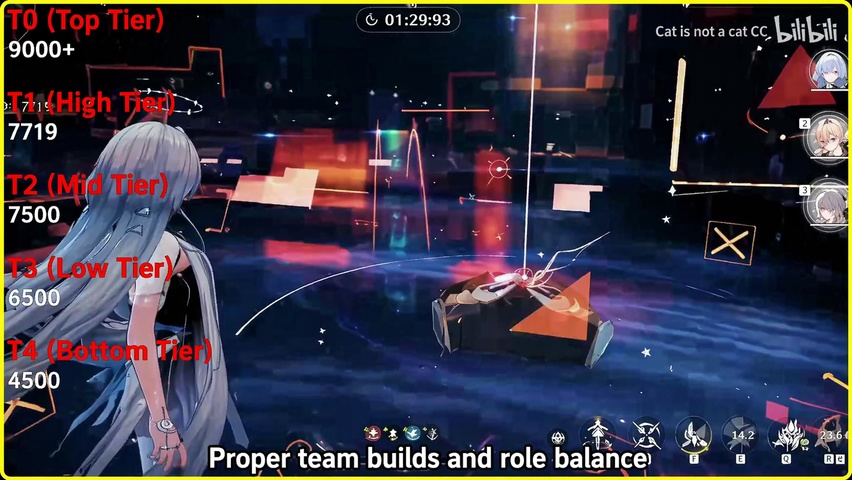
The weighting that matters: 70 percent no-thought rotation (the so-called wheelchair axis) and 30 percent advanced rotation. The reason the wheelchair half dominates is mobile-versus-PC parity. Pre-inputs and tight cancels that work cleanly on PC simply don't exist on phone, so any tier list that leans hard on advanced execution is lying to most of its readers.
Three things actually decide a 3.3 score now: stability under pressure, ability to chase a boss that's airborne or sprinting a hundred meters away, and how forgiving the rotation is when an elbow lands. Raw multipliers don't survive contact with the spaceman.
Benchmarks for "this comp is fine": 7500 points for a second-generation team, 9000 for a third-generation team. Anything below that means the comp is being carried by your patience, not its kit. The Tower of Adversity Hazard Zone gradient itself only pays in 15-crest blocks of 75 Astrite each — chasing the last few crests with a comp that scores 4500 average just to repeat-run is bad ROI, period.
First-generation carries that finally hit the floor
Jiyan's mainstream pair with Mortefi is the cleanest example of why Generation 1 lost the room. The rotation is heavy, the pursuit is almost nothing, and matrix bosses spend half the fight either airborne or sprinting. Fourth place at best. The Jiyan plus Sanhua "seamless ult-link" variant can theoretically clip damage windows beautifully but it demands input-perfect hands in an environment that actively punishes that — diminishing returns, skip it.
Jinhsi enters Incarnation after her Resonance Skill and her fourth enhanced Basic Attack grants Ordination Glow, unlocking the enhanced Resonance Skill "Illuminous Epiphany," and that dragon-breath finisher genuinely interaction — even mid-elbow it still fires. The problem is the ceiling. Jinhsi + Cantarella, Jinhsi + Zhezhi, and Jinhsi + Yinlin all sit at roughly the same power, all stable into trash mob waves, but capping at 5000 means scrounging crit lines to squeeze the dragon-breath. Composite T3.
Xiangli Yao's Resonance Liberation enters Intuition State, granting 3 Hypercubes and Performance Capacity up to 5, which sounds like a triple time-stop on paper, but in the new arena he keeps losing damage to repositioning. Xiangli Yao + Yinlin remains the main shell. Yinlin herself, frankly, is now the poster child for "kit weaker than her weapon" — most teams just use her to chip HP bars on the way to a real burst. One backstep from the boss and the chip turns into a long stare.
Changli's two stable variants are Changli + Roccia and Changli + Sanhua. In matrix specifically Sanhua reads better than Roccia because Roccia's Imagination gauge sits at 300 points across 3 segments, and at 100 or more she enables Real Fantasy Basic Attacks for up to 3 Heavy Attack DMG shots — gorgeous against grounded targets, but a single launch sends her dance routine into the wrong sky-box. Sanhua's quicker concerto build wins out, and even then you're scratching to clear 5000. T4 floor.
Calcharo and Brant — second-gen wheelchairs with a catch
Calcharo's Resonance Liberation Phantom Etching enters Deathblade Gear, where his Basic Attack is replaced with Hounds Roar up to 5 hits, and that swap is exactly why he's still the cleanest no-input carry in the game. Calcharo + Zhezhi runs a near-perfect 25-second cycle, dropping zero damage on mob spawns and getting better the more enemies pile in. Calcharo + Yinlin nudges DPS from roughly 65,000 to 72,000, which sounds nice until you remember the scoring threshold — it still maxes around T3.
Brant teams need hands. Brant + Changli (the typical Fusion stack) tests your targeting and your air-control simultaneously, and both happen to be strengths of Brant's mid-air-focused 5-star Fusion Sword kit, with the 9000-plus shield on Enhanced Skill for 30 seconds and the Outro that adds 20 percent Fusion DMG plus 25 percent Resonance Skill DMG Deepen. Against the spaceman he reads great. The catch is that past matrix round two, Brant needs to double up on his signature echo investment, which a casual roster simply doesn't have, and dropping that requirement means dropping damage.
Zani's split personality and Cartethyia + Sanhua's giant ceiling
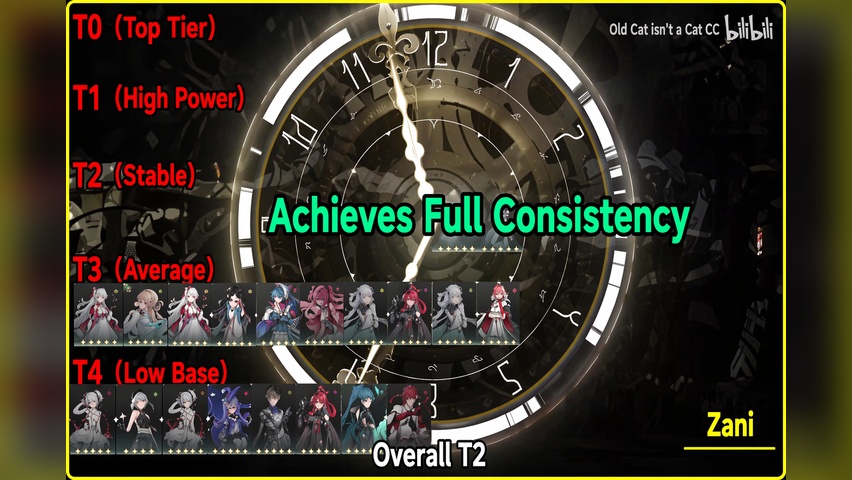
Zani is the most volatile pick in 3.3. Her Resonance Liberation raises Blaze cap to 150, instantly grants 50 Blaze, and lasts 20 seconds, with Burst Phase Stage 3 Nightfall scaling up to 40 Blaze at +9.95 percent multiplier per Blaze point for a max of 795 percent. Translate that to live play and you get a 7000-to-10,000 score swing depending on whether you land two Nightfalls or four. Practically: scoreboard floor T2, top hands T0, but if you eat an elbow during the opening Nightfall, the run is over — restart and re-axis.
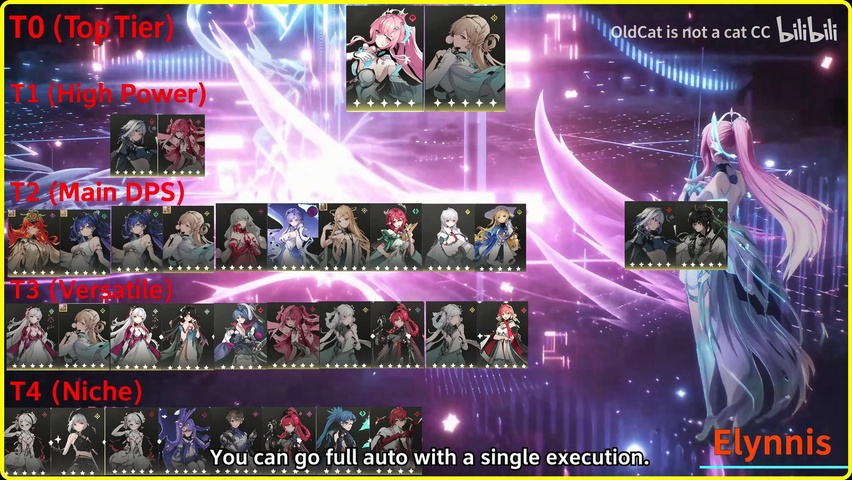
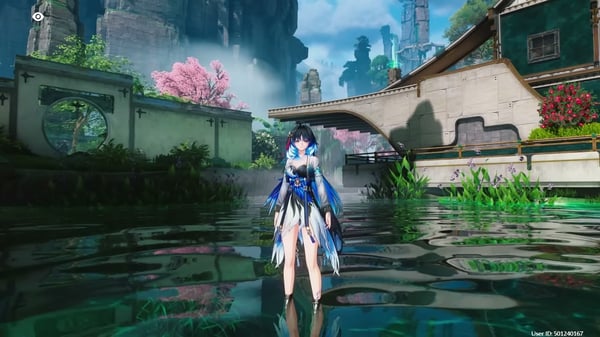
Cartethyia + Sanhua is the biggest "theoretical versus actual" gap in the patch. Going from a single drop combo to a double drop combo takes DPS from roughly 90,000 to 110,000, a ceiling that beats out Hiyuki on the spreadsheet. Cartethyia's Resonance Liberation sacrifices 50 percent HP, transforms her into Fleurdelys for 12 seconds with +60 percent Aero DMG, and builds Resolve up to 120 for the Raging Windblade Against the Tide finisher — which is exactly the kind of fragile, commitment-heavy state that gets shattered if a boss launches. Floor scores can dip below 5000; ceiling clears 13,000. Most players should just drill the simpler double drop. T2 by default, T0 when piloted clean.
Augusta, Iuno, and the Cartethyia + Lupa dark horse
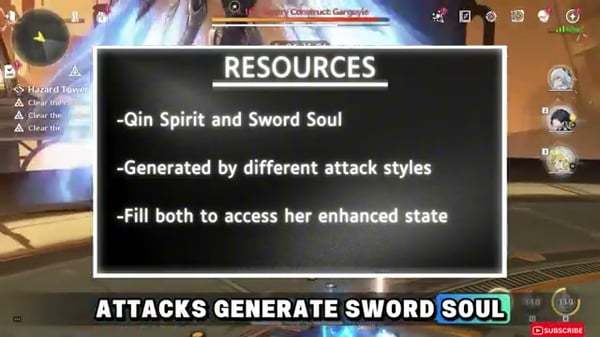
Augusta is being overrated. She's a 5-star Electro Broadblade Main DPS with a gladiator theme, time-stop Ultimate mechanic, and three-resource Momentum/Authority/Deterrence rotation, but the spin-finisher is the entire damage profile and the new bosses interrupt it constantly. Versus the spaceman she goes red-screen; versus the Furnace Core she clears 9000 easily because that target stands still. Augusta + Iuno (the "sun/moon" comp) is the canonical pairing, supported by Iuno's 30-second Full Moon Domain that heals HP and stamina every 5 seconds and grants up to 10 stacks of Wan Light for 40 percent universal DMG Deepen, with the catch that stacks require the active character to gain shields and Iuno provides none. T2 ceiling. Beginner-friendly axis though.
If you don't have both, splitting Augusta off into an Augusta + Mortefi variant and an Iuno + Yinlin variant gets you 5000-plus scores from each side. Iuno + Yinlin is actually easier to pilot than Augusta + Iuno; Iuno herself rarely gets elbowed because she sits in the back firing, just don't fly too high or you bleed damage. Both land at T2.
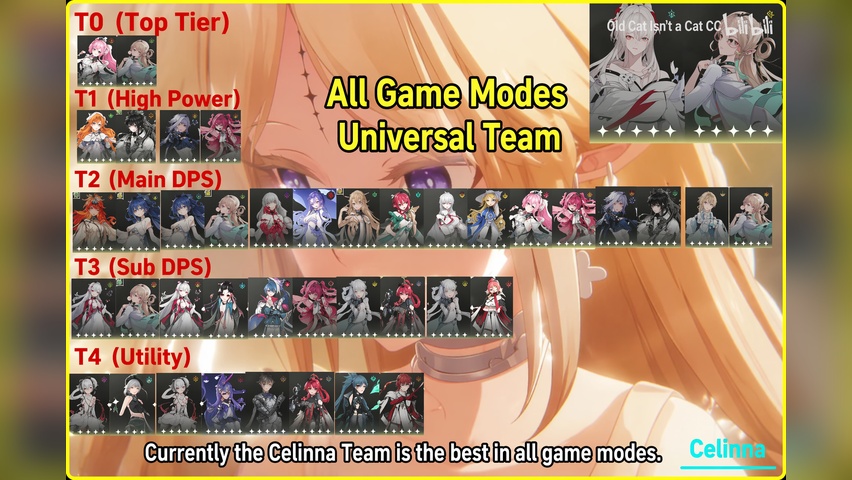
Cartethyia + Lupa is the most underrated team in the patch. Cartethyia's wing pursuit was already strong, and pairing her with Lupa, the 5-star Fusion Broadblade with Wildfire Mark giving +48 percent Resonance Liberation DMG for 6 seconds on Intro or Liberation, extended by Heavy Attack DMG, with each extension granting team +48 percent Fusion DMG Bonus for 30 seconds, makes the rotation buttery. Lupa's built-in auto-dodge means the third-slot uptime is real. Anti-air, smooth output curve, environment-flexible — exactly the kit checklist the new bosses demand. With Mornye in the third slot the axis stays loose; swap in Brant and you crank the ceiling but lose the no-input feel. Six-sided fighter, full T1.
Aemeath and Hiyuki anchor the top of 3.3
Aemeath is the easiest T0 in the game right now. The rotation is short, the output curve is flat, and the gap between a top-end pilot and a fresh player is almost nothing — most damage is already baked into the kit. Aemeath + Yinlin (the "righteous" Fusion-Electro axis) hits roughly 95,000 DPS on a single execution wheelchair line, matching Cartethyia + Sanhua's double-drop and easily clearing 10,000 score. Even running a dual-Rover support flex, the advanced axis stays approachable. Aemeath + Lupa is the strict downside replacement — about 87,000 DPS with a double-cadenza variation, but Lupa's survivability is genuinely nice. That one lands T2 with around 8000 average. The Aemeath + Denia "implosion" comp is the third-gen burst-cluster archetype and it only fully comes online later in the patch when Denia's stat lines are well-tuned.
Hiyuki has the cleanest hand-feel of any 3.3 carry. Strong pursuit, built-in crowd control, primary damage flow that doesn't crumple under elbow pressure. Hiyuki + Yinlin is the mainstream T0: simple wheelchair axis usable in every mode, the only caveat being the rotation runs slightly long and a sloppy pilot times out before the burst tail lands — synchronize Yinlin's concerto window and the issue disappears. The lingering complaint is the first three Basic Attack frames in burst form: those can still get elbow-canceled and no Resonance Chain fixes it. That's the bit waiting on the 3.4 system completion with the Hiyuki + Roccia variant, where the Liberation after-effect aligns with frost-binding crowd control to neutralize that exact window. As shipped today, Hiyuki + Yinlin matches Aemeath + Yinlin at roughly 95,000 DPS and easy 10,000 in the matrix. Co-T0.
What you actually need to invest in
Echo and weapon picks matter way more than chain levels for the comps above. For Hiyuki + Yinlin, Yinlin still wants 5-piece Void Thunder for the 2-piece +10 percent Electro DMG and the 5-piece Heavy Attack or Resonance Skill +15 percent Electro DMG stacking twice for 15 seconds each, with Tempest Mephis as the main echo. Her weapon ladder relative to Stringmaster at 100 percent (500 ATK, 36 percent Crit Rate) goes Cosmic Ripples at 92 percent, Augment at 83 percent, Jinzhou Keeper at 82 percent — meaning a Jinzhou Keeper at S5 is genuinely usable for F2P pilots.
For the Cartethyia + Lupa team, Lupa runs 4-piece Lioness of Glory plus an echo line of Pilgrim's Shell, Kerasaur, Electro Drake, Fusion Drake, with the Resonance Liberation granting team +15 percent Fusion DMG and caster +20 percent Resonance Liberation DMG for 35 seconds. Cartethyia herself sticks with the Gusts of Welkin set and her signature Unyielding Crown of Destiny.
For the matrix's late-stage Calcharo + Zhezhi runs, Zhezhi's Resonance Liberation parks her off-field for 30 seconds, with any team damage triggering up to 21 Glacio coordinated attacks at max 1 per second, and her recommended Energy Regen is roughly 120 percent. Hitting that 120 ER threshold is non-negotiable, and Zhezhi feels miserable below it.
If you're building Zani, recognize that Forte Circuit supplies more than 70 percent of her damage multiplier, so under-leveling her Forte for the sake of Liberation is a bigger trap than it looks. Skill priority order is Forte first.
3.3 anniversary practical grind — codes, crests, and what to spend first
The second anniversary lands May 22, 2026. Three live codes you should redeem now: FACEALEPH1 (100 Astrite, 4 Premium Resonance Potions, 5 Advanced Energy Cores), 2NDANNIVERSARY (100 Astrite, 2 Forgery Premium Supply II, 40,000 Shell), and EVERSHINE (100 Astrite, 20 Premium Tuners, 5 Advanced Sealed Tubes), plus the permanent WUTHERINGGIFT code (50 Astrite, 2 Premium Resonance Potions, 2 Medium Revival Inhalers, 2 Medium Energy Bags, 10,000 Shell). Redemption goes through Terminal, Settings, Other Settings, Redeem — locked behind Chapter 1 Act 1 and Union Level 2.
On the matrix payout side, Tower of Adversity Hazard Zone unlocks after Chapter 1 Act 4 via the side quest Alone in the Abyss by speaking to Sanhua east of Jinzhou. The crest ladder is straightforward: 75 Astrite per tier from 3 through 24 crests, then 50 Astrite at 27 and 30 crests, with Hazard Records and Advanced material drops scaling alongside. The highest two tiers also throw 30,000 Shell Credits and 120 Hazard Records each at 27 and 30 crests, so finishing the gradient is genuinely worth the time even at average scores.
Spending order if you only have time for one carry this patch: Hiyuki if you want clean hand-feel, Aemeath if you want stress-free clears, Cartethyia if you already own Sanhua or Lupa and like ceiling chasing. Phase 1 (April 29 to May 20) is Hiyuki; Phase 2 (May 20 to June 9) is Denia. The confirmed rerun pool covers Carlotta, Cartethyia, Augusta, Iuno, Zani, Aemeath, and Mornye, which means anyone slot-filling Aemeath + Yinlin or Cartethyia + Lupa has a clean window to grab the missing piece. Skip Denia unless you're already committed to the Aemeath + Denia implosion comp — she's a sub-DPS Fusion Rectifier, and the matrix isn't desperate for another one.
Stop chasing tier lists that grade theoretical DPS. Stability, pursuit, fault tolerance — that's what the spaceman and the Furnace Core actually check, and that's why Cartethyia + Lupa is suddenly a hidden T1 and why Aemeath + Yinlin and Hiyuki + Yinlin own the top of 3.3.
Berlin based, Marco Reber writes in English and German about how online entertainment works under the hood — the rate math, the economy loops, the structure of a battle pass once you stop staring at the cosmetics, the way a live-streaming app tunes its gift catalog. He has a soft spot for long-running games and the kind of release notes that read like a balance-patch novel. His VGTopup column handles systems-focused pieces and DACH-region coverage, including the legal-and-regulatory wrinkles that come with German rules around digital goods.
Berlin, Germany English #Game Systems #Economy Analysis #DACH Coverage #Digital Goods #Patch Coverage #Long-Form Features







Comments